This guide will walk you through each step of the process. You’ll first download your existing Hughes.net email messages, then import them into Outlook® so they’re available in your new account. Just follow the instructions below to get started.
| Before you begin: You will need a laptop or a computer as email migration won’t work on your phone. You will need your Hughesnet username and password. You will also need the New Outlook® application and an Outlook® account, if you do not have it installed, please download it from here |
If you do not already have an Outlook account
Create a free Outlook® account before continuing:
- Open the Microsoft Outlook® website and select Create free account.
- Choose the Outlook® email address you want to use. If it is unavailable, choose another address.
- Create a strong password and enter the requested account information.
- Complete the identity verification steps.
Part 1: Export your email from Hughesnet
1. Open Hughesnet Email
Go to myhughesnet.com and sign in with the Hughes.net username and password associated with the mailbox you want to move. From the top of the page, select My Email. The Hughes.net Email page opens.
2. Open Email settings
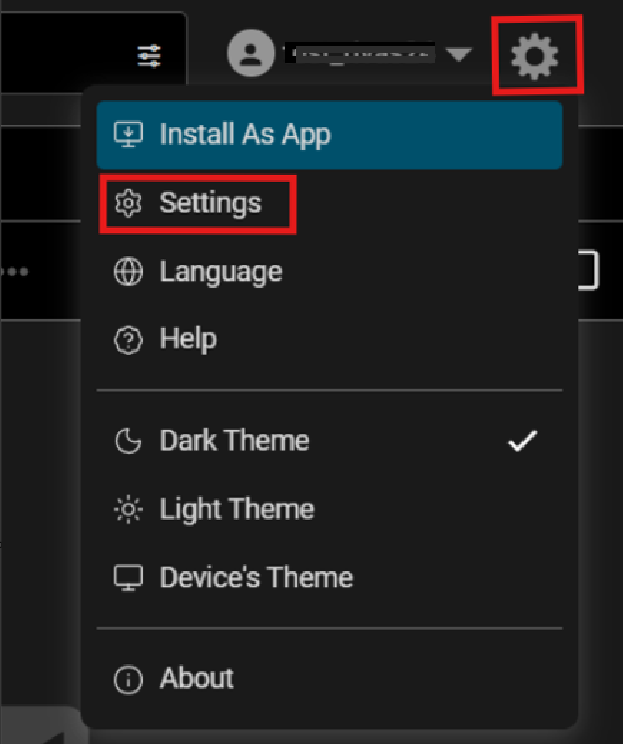
On the Hughes.net Email page, select the Settings icon in the upper-right corner. From the menu, select Settings.
3. Choose the email account
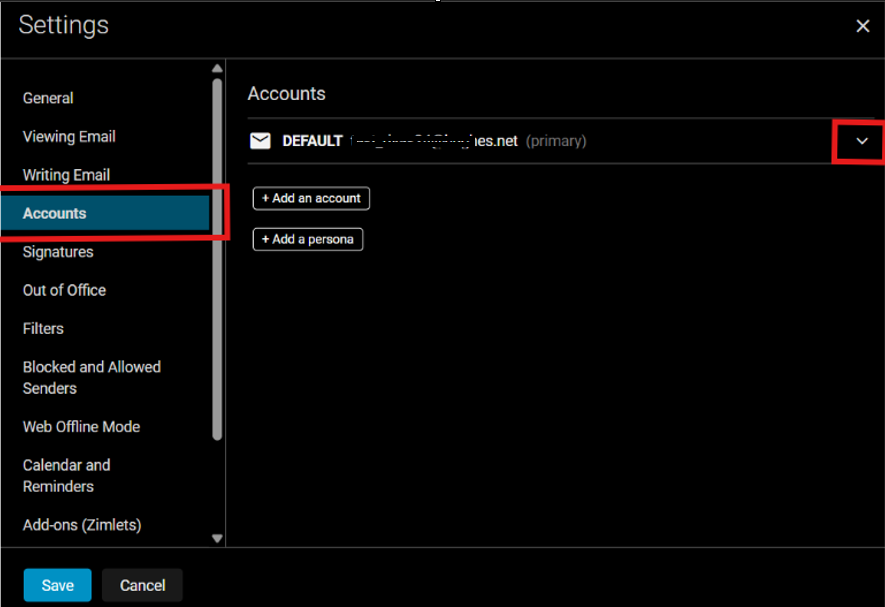
In Settings, select Accounts. Find the account you want to export, and select the downward arrow beside that account to expand its options.
4. Export the mailbox
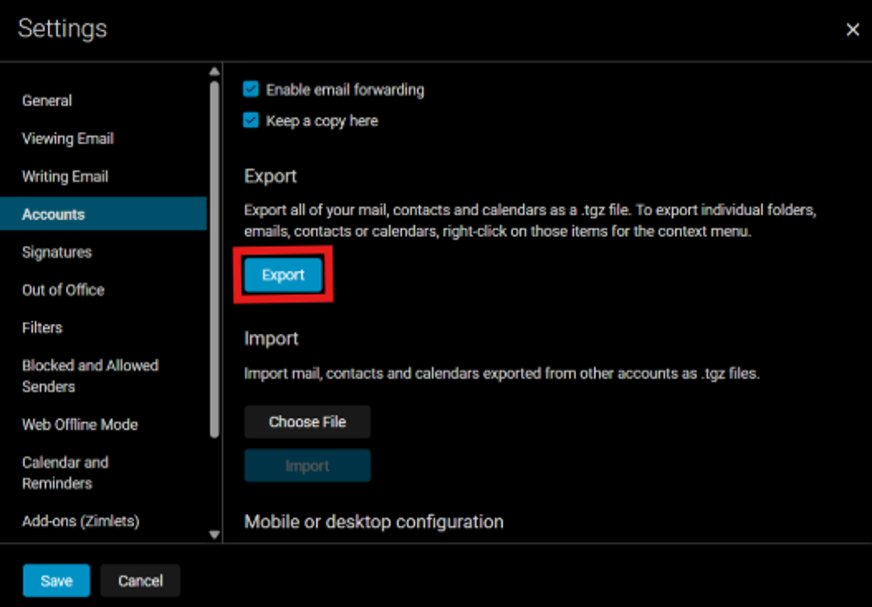
Scroll down to the Export section and select Export. This step downloads your mail, contacts, and calendars as a .tgz archive file. The file is typically saved in your Downloads folder.
| What happens next? The downloaded archive must be extracted before Outlook® can import the email messages. After extraction, the email folders contain .eml files. |
5. Extract the downloaded archive
Open your File Explorer and go to the folder where the download was saved. Right-click the downloaded archive and select Extract All. Choose a folder that is easy to find and complete the extraction.
Part 2: Import the Hughesnet emails into the new Outlook
6. Open the new Outlook
Download and open the new Outlook® application if it is not already installed. Sign in with the Outlook® account that will receive the Hughes.net messages.
7. Open Account info
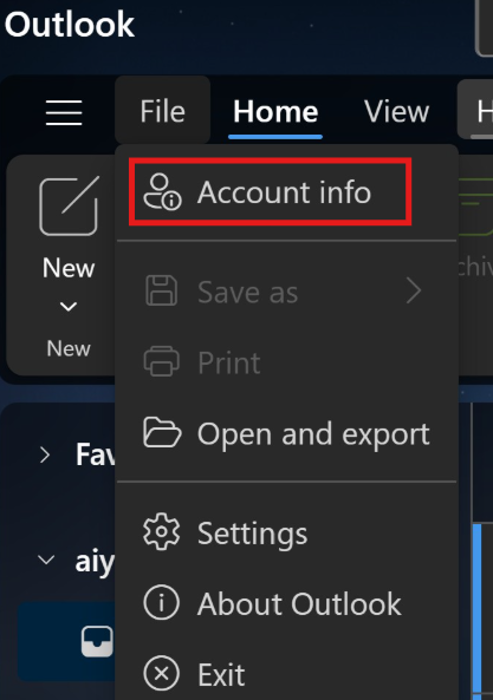
In the upper-left corner of Outlook®, select File, and then select Account info.
8. Start the .eml import
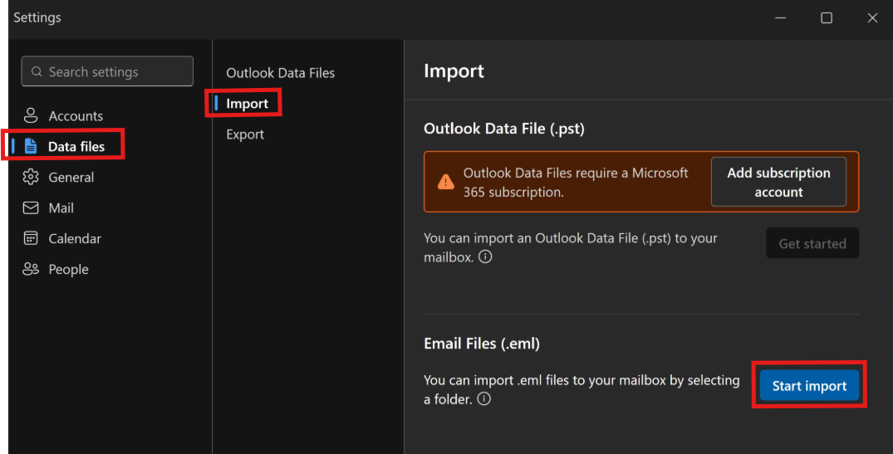
In Settings, select Data files. Under Import, find Email Files (.eml) section, and select Start import. It will open your file explorer.
9. Choose the Hughesnet email folder
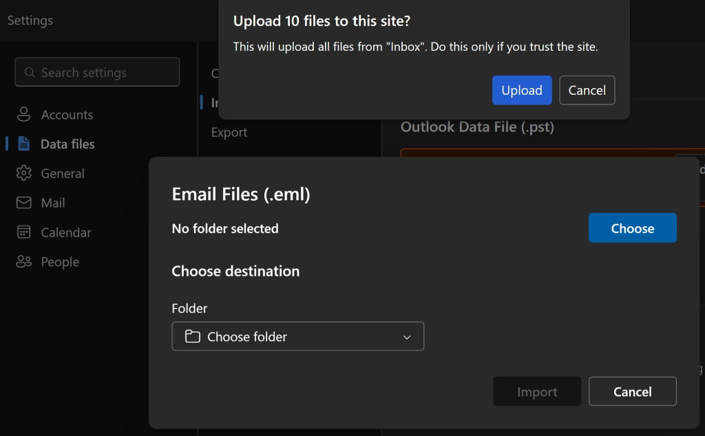
Browse the folder you extracted earlier. Select the Inbox folder and select Upload, and then select Upload again when Outlook® asks permission to upload the files.
10. Choose where the messages will go
Under Choose destination, select an existing Outlook® folder or select Create a new folder. A separate folder, such as Hughes.net Inbox, can make the imported messages easier to find.
11. Import the messages
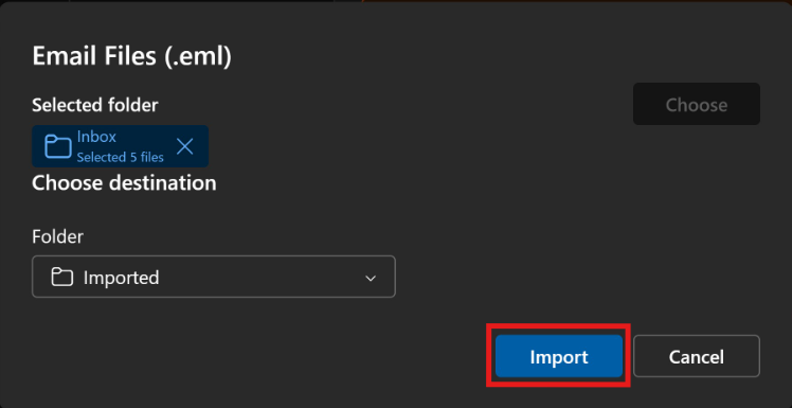
After confirming both the selected source folder and destination folder, select Import.
12. Confirm the import and repeat for Sent/Draft messages
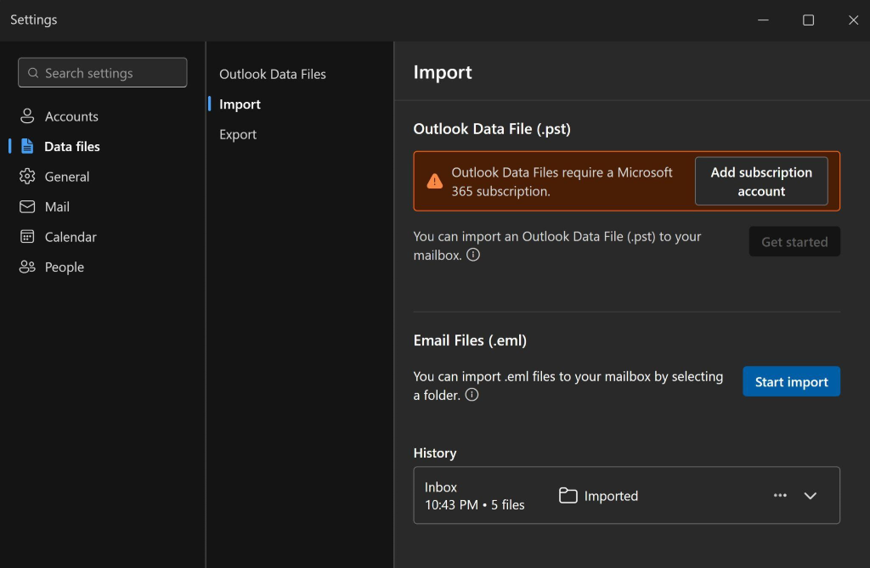
When the import finishes, the result appears under History. Open the destination folder and confirm that the messages are present. To import sent messages, repeat steps 8 through 11 and choose the Sent or Drafts folder from the extracted Hughes.net email archive.
Note: The migration process may take anywhere from a few minutes to an hour, depending on the size of your inbox. Please allow some time for the migration to complete before checking for your emails.
How can I confirm that the migration worked?
- Open the destination folder in Outlook® and confirm that messages appear.
- Keep the original downloaded archive until you finish checking the imported email.
Related FAQs:
View instructions to transfer your hughes.net emails to Gmail® here.
View instructions to transfer your hughes.net emails to Yahoo® here.