Click here to access the Modem replacement guide.
How does Hughesnet Voice work?
Hughesnet® Voice uses advanced Voice-over-IP (VoIP) technology to deliver a feature-rich home phone service over your satellite connection. New Hughesnet customers will have their Analog Telephone Adapter (ATA) set up by their installer during the installation appointment which will route your calls through your satellite modem and dish without using your plan data. It’s as easy as that!
What is Phone Number Porting?
Number porting, also known as ‘Transferring your number’ means that you are taking an existing phone number from one provider and transferring it to another. If you have just ordered Hughesnet® Voice, you may be eligible to transfer your number from your previous carrier to Hughesnet Voice. To determine eligibility, call Customer Care at 866-347-3292. You will need to provide your Site Account Number (SAN) found on your monthly invoice, as well as your existing telephone number. If you have already cancelled service with your previous carrier, you will not be able to transfer your number to Hughesnet Voice.
Can Hughesnet request my number transfer (number porting) for me?
Unfortunately, no. It is an important FCC regulation that you, as the owner of the phone number, be the person to authorize a transfer request. You can start the request by going to myhughesnet.com. Click on Account, Voice, then click on Manage next to your voice service plan.
For more information on porting, click here.
How do I find out if my number is eligible for a transfer?
To determine eligibility, call Customer Care at 866-347-3292. You will need to provide your Site Account Number (SAN) found on your monthly invoice and your existing telephone number that you would like to transfer to your Hughesnet® Voice service.
To learn more about Hughesnet Voice features, click here.
To learn more about how to transfer your phone number, click here.
What information will I need to provide when completing a number transfer request form?
- Telephone Number to be transferred – the number you want moved from your old provider to Hughesnet® Voice.
- First and Last Name, Address, City, State, and Zip Code associated with previous phone company account.
- Previous phone company name (ex. Verizon, Sprint)
- Previous phone company account number
- Account PIN (if available). Some accounts are protected by an account PIN password. Please contact your previous telephone provider before submitting a request if you are unsure if your account is protected by a PIN password.
For more information on porting, click here.
What is the difference between Data Tokens and Bonus Zone?
Bonus Zone (formerly known as Bonus Bytes)
Your service plan includes high-speed data available in the Bonus Zone, previously known as Bonus Bytes. It is the period of time between 2am-8am local time, when you have access to additional high-speed data, even if you have exceeded the amount of data in your Service Plan. This data is used automatically whenever you use Hughesnet® during the Bonus Zone hours.
One way you can take advantage of the Bonus Zone and save your service plan data is to schedule your software updates to occur during this time!
Data Tokens
If you exceed your service plan data, with or without using the data in the Bonus Zone, you can stay connected at full speeds until the next billing cycle with Data Tokens. Data Tokens give you more service plan data for an additional charge and are billed on your next monthly billing statement. Hughesnet Internet Continuity customers can purchase Data Tokens if they exceed their monthly service plan data. You can purchase Data Tokens through your myhughesnet.com account, or on the myHughesnet (Mobile) App. Data Tokens will be automatically applied when your service plan data has been used. In addition, Data Tokens never expire, so if you have a remaining Data Token available when your monthly reset occurs, the data will remain in your account until you use it.
Learn more about Data Tokens here
Where do I view and pay my bill?
Make a payment and view your bill invoices after signing into your Hughesnet® Account:
1. Register or Sign In to myhughesnet.com.
2. Click on ‘Billing’ on the header then select ‘Make a Payment’. The following page displays the amount due, invoice number and provides links to view your invoice and payment history. If a payment is due, you will see the ‘Pay’ button.
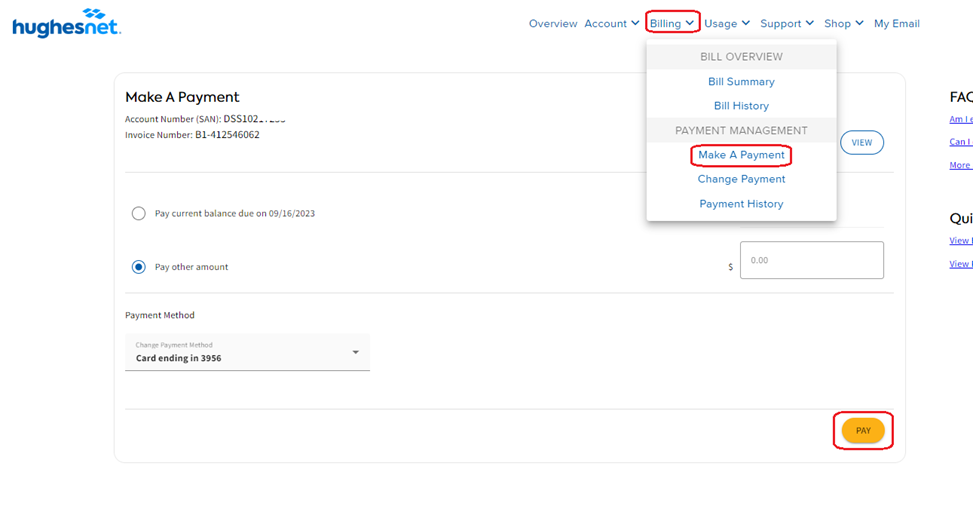
3. You can also click on the card icon in the header to navigate to the payment page.

Alternatively, if you haven’t yet created a myhughesnet.com login, you can still make an online payment without logging in. Simply click on the ‘Pay Now’ link in the top menu, then enter the SAN and Zip Code information to view the outstanding balance and proceed with the payment. However, we highly recommend creating a login on myhughesnet.com to access the suite of features it offers.

Understanding my Hughesnet bill
Hughesnet® bills one month in advance, much like your rent or mortgage would be. If you make a change to your service plan or add or cancel additional services during the billing cycle, that change will be reflected on your next bill. If you upgrade your plan in the middle of a cycle, your billing for the next month will include the charge of upgrading your plan, along with any prorated charges.
What are my charges?
This is a sample Hughesnet Bill:

Your Service Plan charge, Equipment Lease (if you did not purchase your equipment), as well as Optional Services like Express Repair and Hughesnet Voice are all recurring monthly fees. These charges will remain the same each month unless you make a change to your account, or if you are benefiting from a promotion which only extends for a limited time.

If you have a promotion with your plan, such as a discount every month, the discount will show as a monthly credit that reflects your promotion. The ‘(1 of 12)’ shows that this is the 1st month of a 12-month promotion. If your bill says ‘(12 of 12)’, that is the last month you will receive your special promotion.

If you have ‘One Time Credit’, the discount shown will only be applied to that month’s bill. Similarly, a ‘One Time Fee’ will only apply for that month.
The total amount you are paying for the month will appear at the bottom of the bill where it says Total.

How can I get a personalized walkthrough of my bill?
Your myhughesnet.com account can now provide an audio walkthrough of your bill. You can access the walkthrough in the following ways:
1. From ‘Bill History’ page:
Step 1: Visit ‘Billing’ > ‘Bill History’ and click on the ‘VIEW/EXPLAIN BILL’ button on any of the invoices.
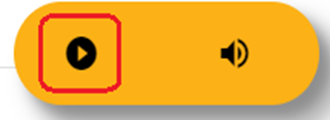
Step 2: Click on the play button (highlighted below) at the bottom right corner of the screen to start the audio walkthrough of your bill.

2. From the ‘Bill Summary’ page:
Step 1: Visit ‘Billing’ > ‘Bill Summary’ and scroll down the page to find ‘BILL DETAILS’ button.
Step 2: Click the ‘BILL DETAILS’ button to find the play button (highlighted below) at the bottom right corner to start the audio walkthrough of your bill.
For instructions on where to view and pay your bill, click here.
Where can I read the Privacy Policy?
Hughesnet® is committed to protecting the privacy of its subscribers. Review the Privacy Policy at any time here.
Am I enrolled in recurring payments?
When you become a Hughesnet® customer, you are automatically enrolled in recurring payments using the payment method you provided at the time of order. This method of payment is easier for our customers and means you don’t have to remember your bill due date or write a check. Plus, it’s beneficial to the environment. You can update your payment method anytime from myhughesnet.com.
To update your payment information:
- Sign in or Register on myhughesnet.com
- Click on ‘Billing‘ at the top of the page then ‘Change Payment‘.
- Update payment information then click ‘Save Payment‘.
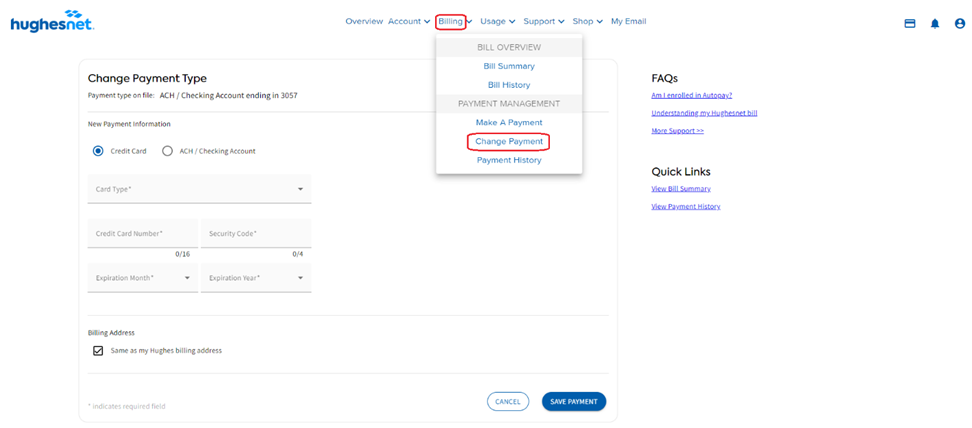
Acceptable payment types include credit card, debit card, checking account (also referred to as ACH or echeck). Please note that we do not accept pre-paid gift cards as a payment type. By setting up recurring payments, you are enrolling in AutoPay.
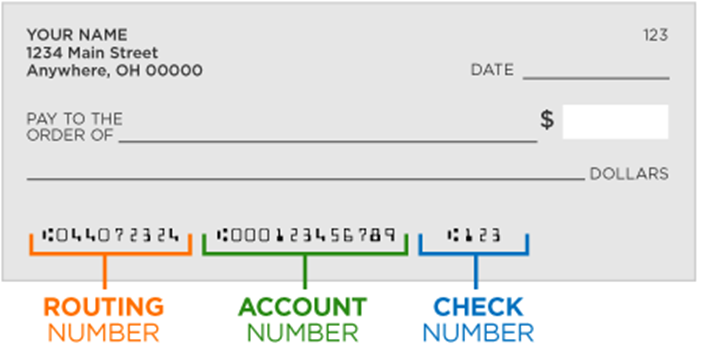
Tip: Enroll in recurring payments using your ACH/Checking Account to get additional savings on your monthly bill. An ACH payment is a type of electronic bank-to-bank payment using your checking or savings account. You can find your Routing and Account Number information by logging in to your online bank account or by checking the bottom of your check, as shown below:
To disable your automatic payment, contact Customer Care at 866-347-3292. Printed invoices are provided at the customer’s request and require an additional monthly fee.