Ensuring your Multipath (WL3000) and Modem are properly connected, helps you to enjoy more responsive internet experience. Please follow the steps below to ensure the connections are accurate:
Check Connections:
Ensure that an Ethernet cable (at least Cat5e or better) is firmly plugged into the Modem’s “LAN” port and the “SAT Ethernet” Port of the Multipath (WL3000) device.
If the cable is properly connected,
The light on the “SAT Ethernet” port of the Multipath (WL3000) will be ON. refer image a below.
Also, all the lights on the front of the Multipath (WL3000) will be ON. refer image b below.
This indicates the connections are accurate and you are all set.
If all the lights on the Multipath (WL3000) are still not ON, please follow the steps below:
Power Cycle Multipath (WL3000):
Turn OFF the Multipath (WL3000) by unplugging it from the power source. Wait for a few seconds, and plug it back in.
Wait for 1 minute and check if the lights on the Multipath (WL3000) are ON as shown in the image above.
Power Cycle your Hughesnet® Modem:
If the lights are still not ON, turn OFF the Modem by unplugging it from the power source. Wait for a few seconds, then plug it back in.
Wait for 2 minutes and check if the lights on the Multipath (WL3000) are ON as shown in the image above.
Even after following all the above steps, if the lights on the Multipath (WL3000) are still not ON, it’s time to call Customer Support at 866-347-3292 for further assistance.
Note:Always ensure safety when checking and handling equipment. If you’re unsure about any step, it’s best to call Customer Support right away.
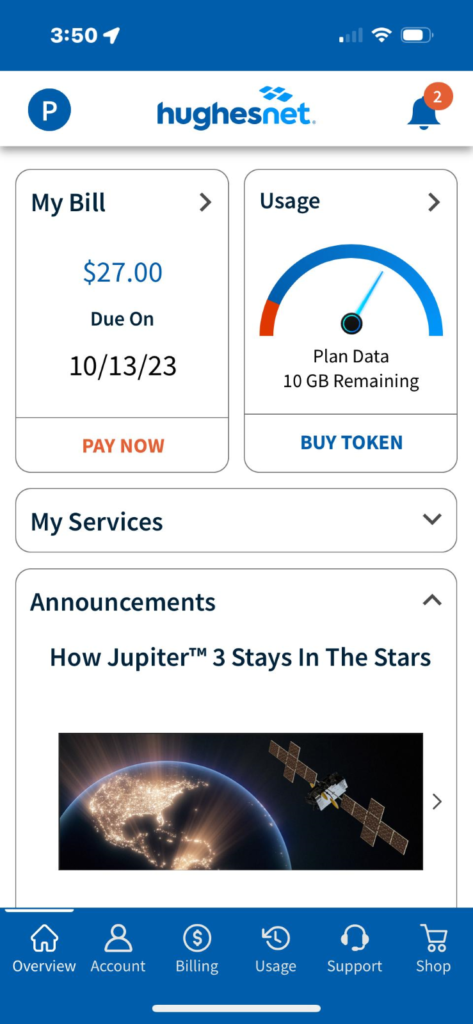
Alerts are specific to you and contain important information about your account.
When logged into your account on myhughesnet.com, the number of unread alerts appear next to the bell icon in the upper right corner of each page.
On the Mobile App, the number of unread alerts appear next to the bell icon in the upper right corner of each screen.
From either myhughesnet.com or the myHughesnet (Mobile) App, clicking on the bell icon will take you to an alerts page where you can review an alert, delete an alert, or mark an alert as unread. Clicking on the alert will automatically mark it as read and remove it from the count of unread alerts next to the bell icon. If you choose to mark the alert as unread, it will continue to be counted as an unread alert next to the bell icon. From the Mobile App, you can also access alerts by clicking on the Account icon at the bottom of each screen and then selecting the Alerts option.
Para garantizar su seguridad y la de los suyos, por favor considere lo siguiente.
¿Cómo debería colocar mi módem?
Las siguientes recomendaciones le ayudarán a obtener una operación óptima de su Módem Hughes.
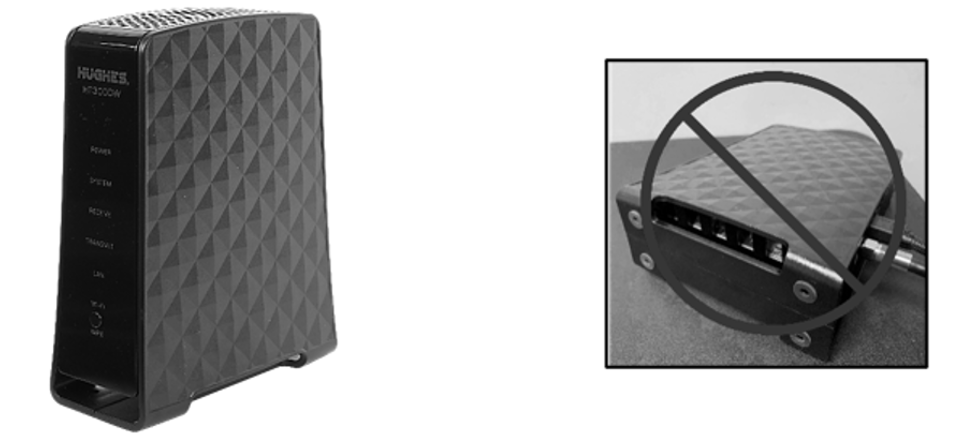
El módem debe ser ubicado en un área con ventilación y colocarse en forma vertical, como se muestra en la imagen de la izquierda. NO lo coloque horizontalmente, como se ilustra en la imagen de la derecha.
Imagen 1: Posición correcta del módem Imagen 2: Posición incorrecta del módem
El módem debe ser ubicado en alguna parte central de su hogar (en una sala o en el cuarto familiar) para obtener señal óptima de Wi-Fi.
¿Dónde NO debería colocar mi módem?
Su módem no debe ser colocado en gabinetes o locaciones cerradas. Adicionalmente, no debe haber nada a una distancia menor de 30 centimetros hacia los lados y por encima del módem, ya que puede restringir el flujo de aire.
Esto no solo previene sobrecalentamiento del módem cuando está en uso, sino que además proveerá de una mejor señal para sus equipos.
¿Cómo conecto correctamente el módem?
Para ayuda sobre cómo instalar correctamente su módem, por favor consulte esta guía de instalación del módem.
¿Su módem se sobrecalienta?
Usted puede identificar si su módem se está sobrecalentando si la luz LED de “Power” cambia a color ROJO. Para resolver este problema, por favor siga las instrucciones:
Paso 1: Aleje cualquier otro equipo o artículo cercano, a más 30 centimetros del módem.
Paso 2: Si el módem aún se sobrecalienta, desconecte la fuente de corriente eléctrica del módem desde la pared y revise el conector ubicado detrás del módem. Asegúrese de que las conexiones estén firmes, y que el mecanismo de seguro del conector esté puesto.
Paso 3: Espere 3 minutos antes de conectar el módem a la fuente de corriente eléctrica.
Si el problema persiste, llame a Atención a Clientes HughesNet (800) 953-0237
¿Qué debo hacer si detecto humo o algún olor a quemado dentro de mi módem?
En caso de detectar humo saliendo del módem, inmediatamente desconéctelo desde la pared y llame a Atención a Clientes HughesNet (800) 953-0237
Si el humo u olor a quemado no están al interior del módem:
Paso 1: Desconecte el módem.
Paso 2: Revise el área alrededor para detectar si hay objetos a menos de 30 centimetros del módem. Si es así, revise si alguno de esos objetos pudo causar el humo.
Paso 3: Una vez alejados todos los objetos, espere un par de minutos para que el módem se enfríe y reconecte la fuente de corriente eléctrica de la pared.
Paso 4: Si el módem no tiene olor a humo o quemado, remueva todos los objetos cercanos a menos de 30 centimetros del módem y manténgalos alejados del módem a futuro.
Paso 5: Si el olor a humo o quemado persiste en su módem, inmediatamente desconecte de la fuente de energía eléctrica y llame a Atención a Clientes HughesNet (800) 953-0237
¿Qué debo hacer si veo chispas saliendo del módem?
Si las chispas provienen del interior del módem, inmediatamente desconecte el módem desde la pared, aleje cualquier material u objeto del área, y llame a Atención a Clientes HughesNet (800) 953-0237
Si las chispas no provienen del interior del módem:
Revise si el cable de la fuente de energía eléctrica está colocado correctamente en la parte posterior del módem:
Si sí:
¿Detecta algún problema con las coberturas del cable de energía eléctrica o del cable coaxial? Si es así, inmediatamente desconecte de la corriente eléctrica desde la pared y llame a Atención a Clientes HughesNet (800) 953-0237
Si no:
Paso 1: Inmediatamente desconecte el módem de la fuente de energía eléctrica desde la pared
Paso 2: Por favor desconecte el cable de la fuente de energía eléctrica del modem y reinsértelo, asegurándose de que esté colocado y asegurado correctamente a la parte trasera del módem.
Paso 3: Conecte de nuevo el módem a la fuente de energía eléctrica
Si ya no hay chispas, monitoree el módem y en caso de que ya no se presenten, continúe usando el módem, conectándolo de forma correcta.
Si las chispas permanecen, inmediatamente desconecte la fuente de energía eléctrica desde la pared, despeje el área de cualquier material y objeto, y llame a Atención a Clientes HughesNet (800) 953-0237
Si necesita desconectar la fuente de energía del módem, desconecte desde la pared, no desde la parte posterior del módem.
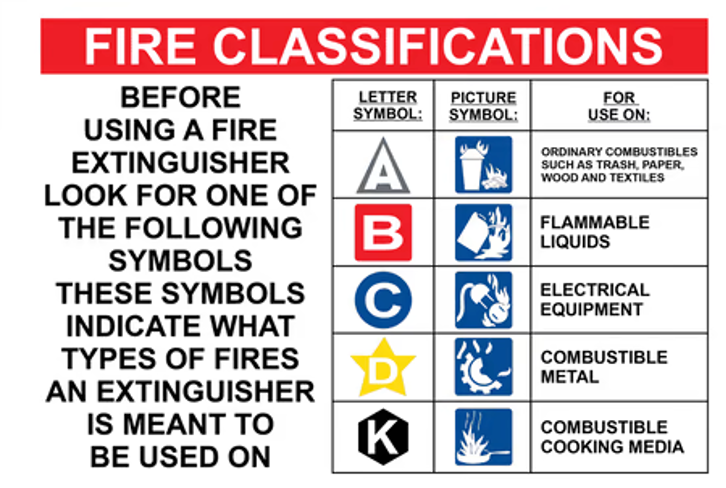
¿Qué debería hacer si veo fuego saliendo del interior de mi módem?
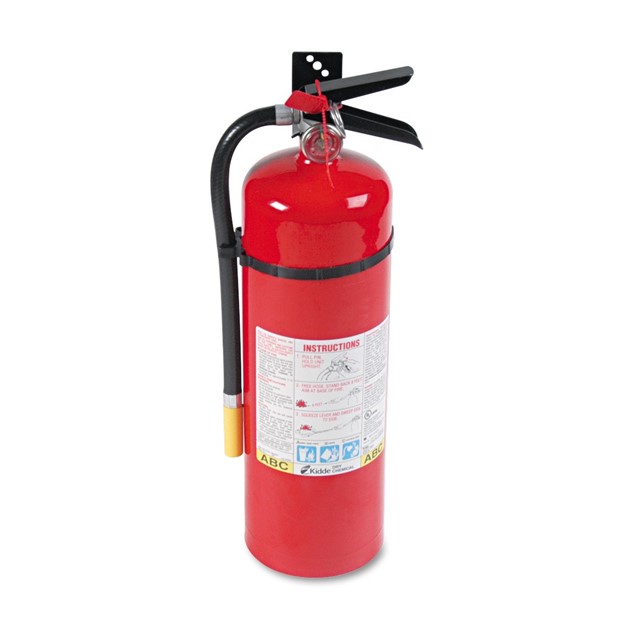
Use un extinguidor de fuego “Clase C” indicado para fuego causado por electricidad.
Después de extinguir el fuego, desconecte inmediatamente de la fuente de energía eléctrica desde la pared y llame a Atención a Clientes HughesNet (800) 953-0237
Si el fuego no proviene del interior del módem:
Paso 1: Extinga el fuego usando un extinguidor “Clase C” indicado para fuego causado por electricidad
Paso 2: Desconecte el módem
Paso 3: Revise el área alrededor y en caso de haber objetos a menos de 30 centimetros del módem, determine si alguno de esos objetos ocasionó el fuego.
Paso 4: Una vez que todo objeto fue alejado, espere un par de minutos para que el módem se enfríe y reconecte directamente a la fuente de energía desde la pared.
Si el módem ya no tiene aroma a humo o quemado, remueva todos los objetos a menos de 30 centimetros del módem y manténgalos alejados del módem en el futuro.
Si el módem aún tiene aroma a humo o quemado, inmediatamente desconecte de la fuente de energía eléctrica y llame a Atención a Clientes HughesNet (800) 953-0237
A “Recovery Mobile Number” is a great way to access your myhughesnet.com account should you forget your password. Once setup, you can request a one-time code to be sent to the number to setup a new password for your account.
For instructions on how to reset your password using your recovery mobile number, click here.
You can setup a “Recovery Mobile Number” when you are newly registering on myHughesnet.com. For instructions on how to register on myHughesnet.com, click here.
If you have not previously setup a “Recovery Mobile Number”, or would like to update it, follow the instructions below:
The process of transferring your telephone number from one Voice service provider to another, is called Phone Number Porting.
Most new Hughesnet® Voice customers can bring their current telephone number when switching to Hughesnet. The following FAQ article highlights key details including any instructions that must be followed to submit a port request.
Important things to remember:
Not all phone numbers can be ported.
While we always do our best to process every number porting request, please be aware that there may be some factors beyond our control that could prevent us from successfully porting your number. You can check if a number can be ported in the following two ways:
1. myhughesnet.com:
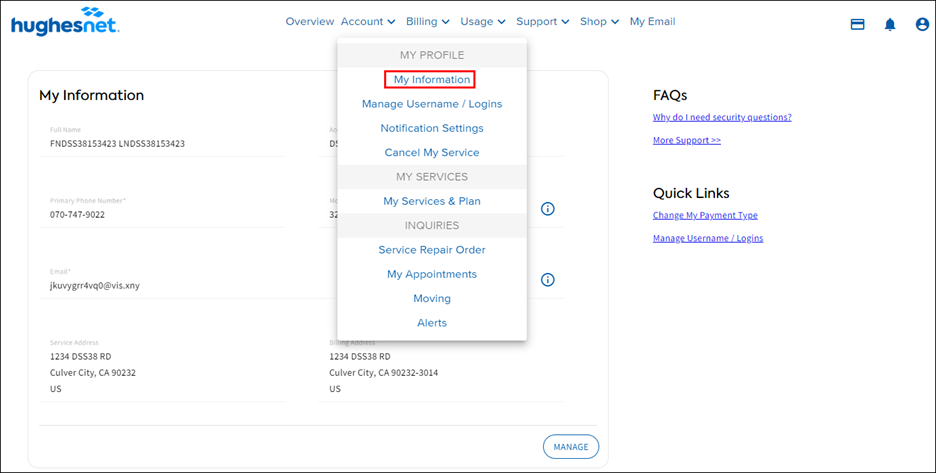
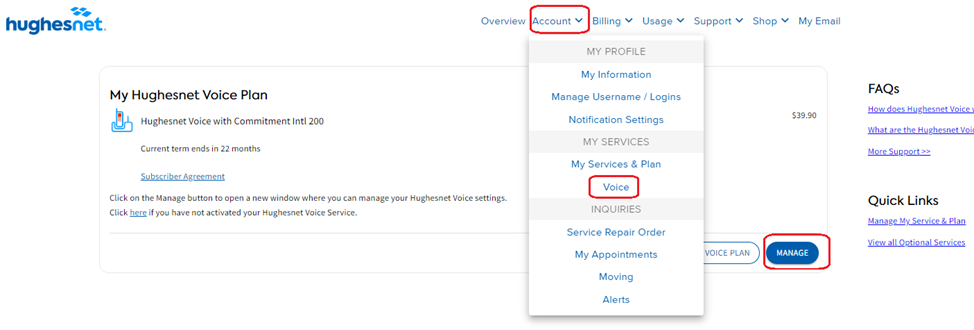
Step 1: Register or Sign in to your account and visit ‘Account’ > ‘Voice’ > ‘Manage’ for the Voice service you want to request the porting.
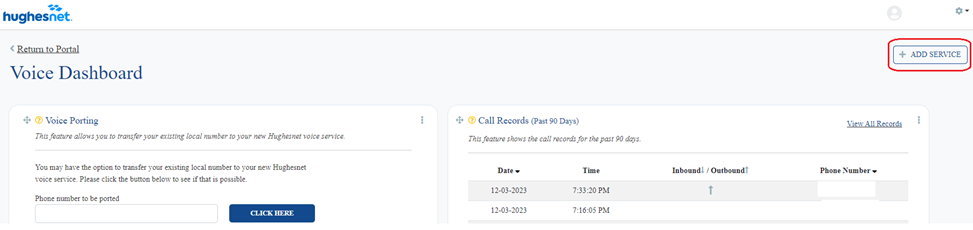
Step 2: Enter the Phone number you want to port, into the ‘Voice Porting’ widget on the ‘Voice Dashboard’.
Note: If you can’t find the ‘Voice Porting’ widget on the dashboard, you can add it by clicking the ‘ADD SERVICE’ button on the top right corner as shown below:
Step 3: If the number is eligible for porting, you will be directed to the port request page, where you can initiate the porting process.
2. Call Hughesnet Customer care at 866-347-3292
Only you can do it!
As per the FCC mandate, only you can submit a request to port your number. Although we can help you in submitting the information, it is only you, who can submit the request.
Activate your Hughesnet Voice service first to get a temporary phone number during the porting process.
For you to submit a port request, you will have to activate your Hughesnet Voice service first. On activation, you will be given a temporary phone number which will be replaced by your old phone number once the porting process is completed successfully.
Do not cancel Voice service with your previous carrier until the number porting process is completed.
If you cancel service with your old provider before the port request has completed, your previous telephone provider may recycle that telephone number and you could lose the ability to keep your number. Wait until you have received confirmation that your port request has finished before you terminate service with your current carrier.
Other things to note:
Can take up to 10 business days to complete.
Although we make every effort to complete the porting process early, there are many external factors that could make the process take up to 10 business days.
Keep checking your email for updates.
Be it updating you about the status or to seek more information during the porting process, we will be sending you emails with important information that might require your immediate attention.
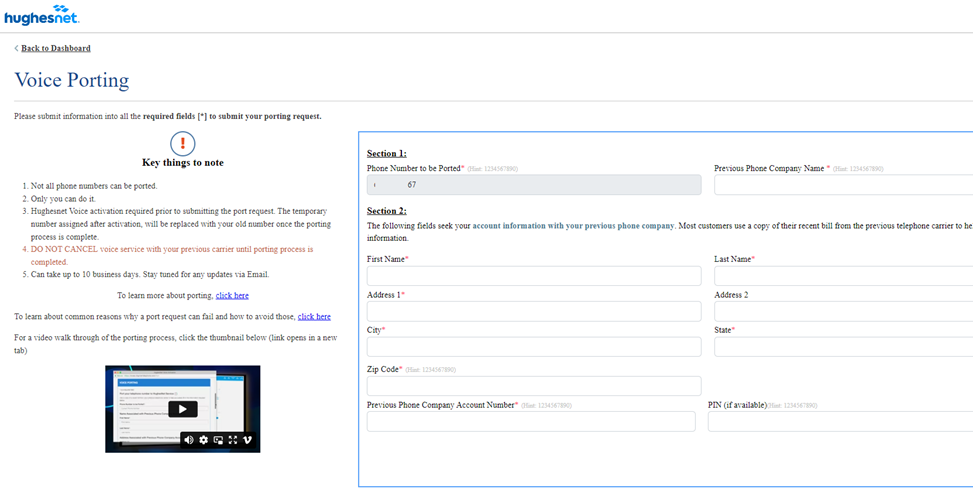
How to submit a Port Request
Step 1: Register or Sign in to your account on myhughesnet.com
Step 2: Navigate to ‘Account’, then ‘Voice’, and finally ‘Manage’ to access and manage your Voice features. This includes setting up Voicemail, call forwarding, and more.
Step 3: On the ‘Voice Dashboard’, check if your number can be ported. If the number can be ported, you will be shown the ‘Voice Porting’ page.
Step 4: Submit the form with all the required information. We highly recommend checking the ‘Key things to note’ section to avoid common errors when submitting the form which can expedite the processing of your port request.
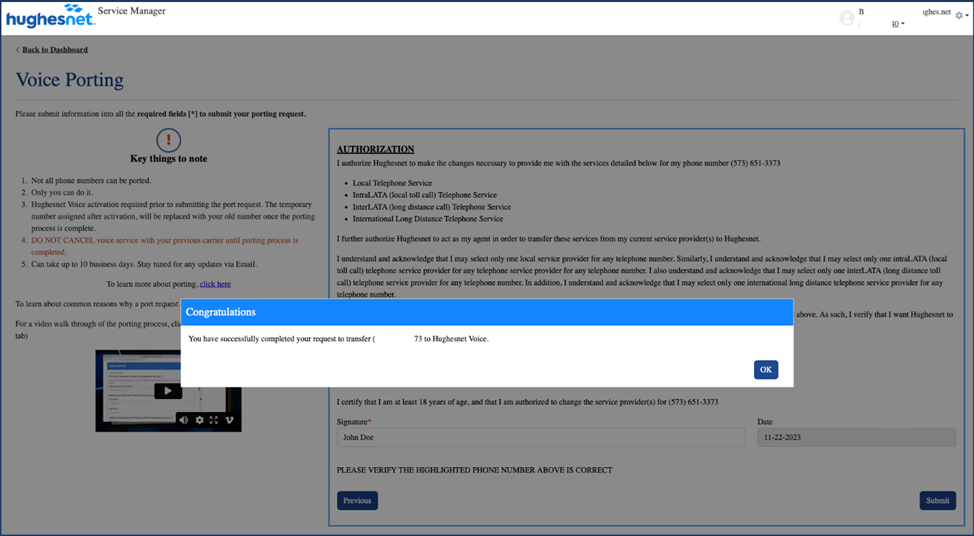
Step 5: Complete the authorization form to submit the port request. You will receive a confirmation that that the port request is submitted successfully.
What happens to call when the number transfer is still in process?
While we process your port request, you’ll keep receiving calls on your temporary Hughesnet phone number. Once the process is successfully completed, your temporary number will be replaced by your original phone number (the one you want to port to Hughesnet), and all calls will be directed to this ported number.
What happens if something goes wrong with my phone number transfer request?
In case your request fails, you will receive an email containing instructions explaining why the port request failed. You will then need to resubmit the form. Please note that a valid email address is required for communication, and the process may take up to 10 business days from form submission.
Check out our other related FAQs below:
For information on activating your Hughesnet Voice service, click here
For information on Hughesnet voice features, click here
For information on how Hughesnet Voice works, click here
Registering on myhughesnet.com can provide you with great benefits including the ability to view and pay your bill online, check personalized plans and offers, make plan changes, buy and manage your Optional Services like Voice, purchase tokens to name a few.
Before you register, you will need the following information:
SAN (Site Account Number): If you do not know your SAN, you can find it on your monthly statement, or from http://www.systemcontrolcenter.com (only when connected to your Hughesnet® internet) or from your Order Confirmation email.
Daytime Phone Number listed on your Hughesnet account.
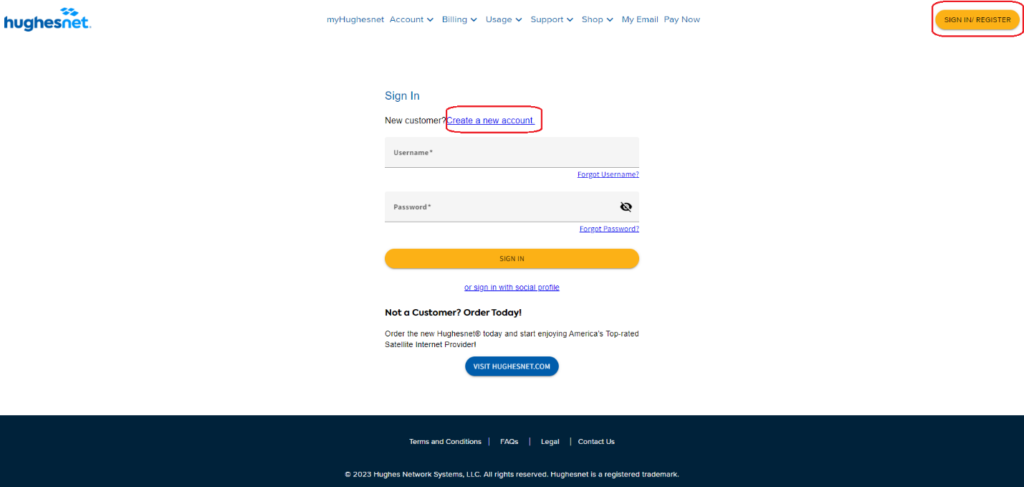
Registering on myhughesnet.com is a simple process.
Step 2: On the screen, select ‘Create a new account’.
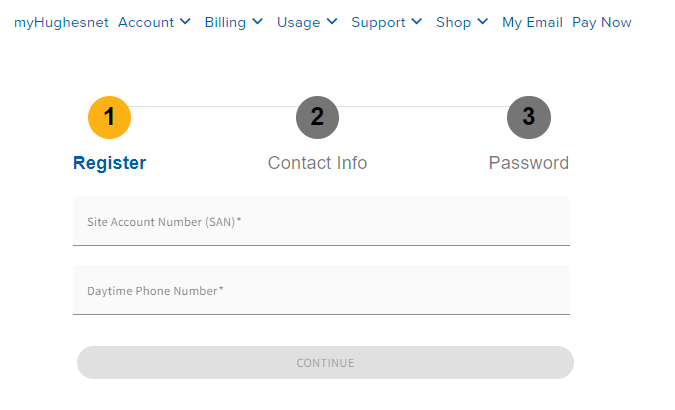
Step 3: Enter the ‘SAN’ and ‘Daytime Phone Number’ to continue.
Step 4: Create a Username and enter your recovery email address. Note: Please ensure that you have provided your “Recovery Mobile Number”, in order to receive a one-time code on your phone should you forget your password.
Step 5: Setup your Password, and setup security questions so that you can use those to reset your password anytime in the future. Click here to learn more about security questions.
Please note that the Password must follow the minimum requirements as follows:
Minimum 6 characters
Contain at least one number
Contain at least one uppercase letter
Contain at least one lowercase letter
Contain at least one special character (symbols) like ~ ! @
Please note we cannot accept the special characters * # ( ) ^ \ |
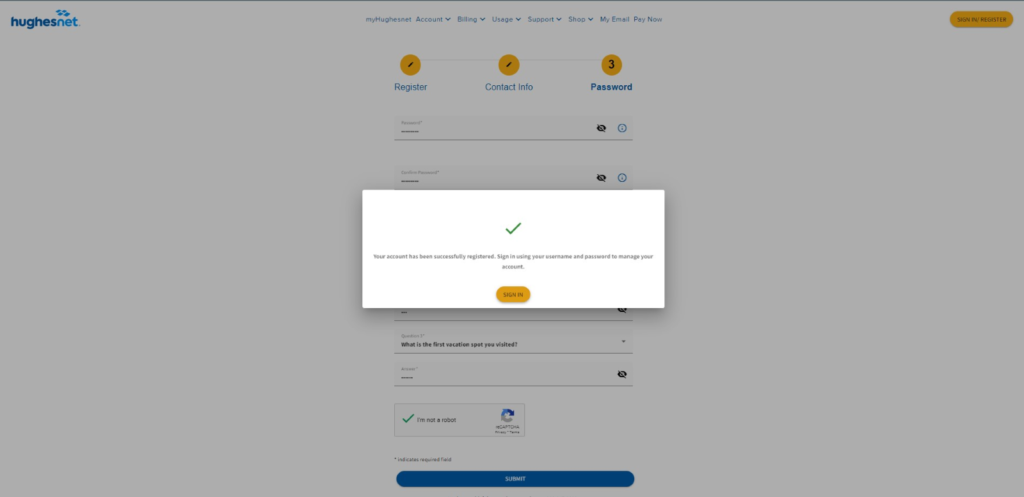
Once the registration is complete, you can sign in using the username and password you just setup on myhughesnet.com or on the Hughesnet Mobile App. Click here for instructions on how to download the Hughesnet Mobile App.
What Payment Options are available on myhughesnet account?
myhughesnet.com allows you to make a payment using any of the following options:
ACH (Checking Account)
Credit Card
Debit Card
Please note that we do not accept pre-paid gift cards as a payment type.
How do I setup recurring payments on myhughesnet account?
You can setup recurring payments by following any of the following methods:
Method 1: Login to your myhughesnet.com account
Once you are logged in to your myhughesnet account, you can update your default payment (AutoPay) option by following the instructions below:
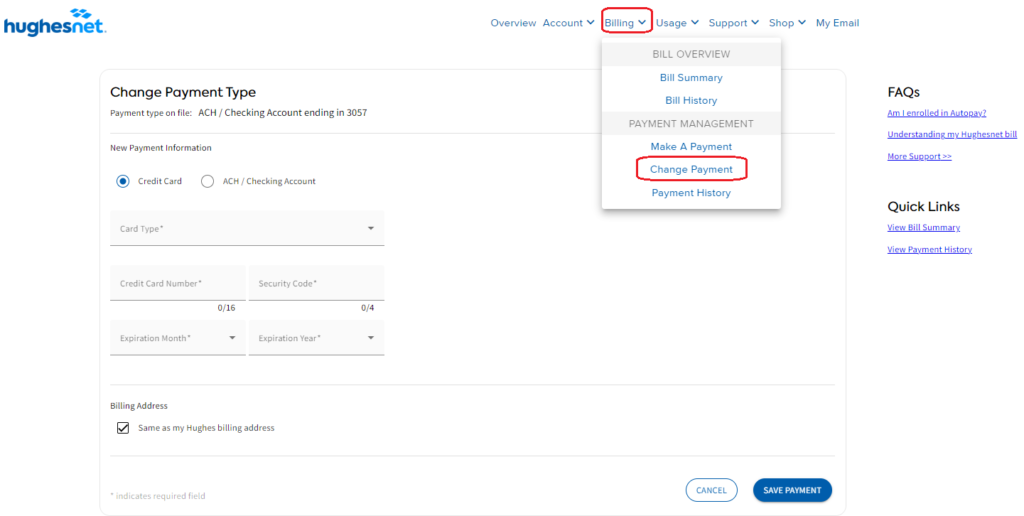
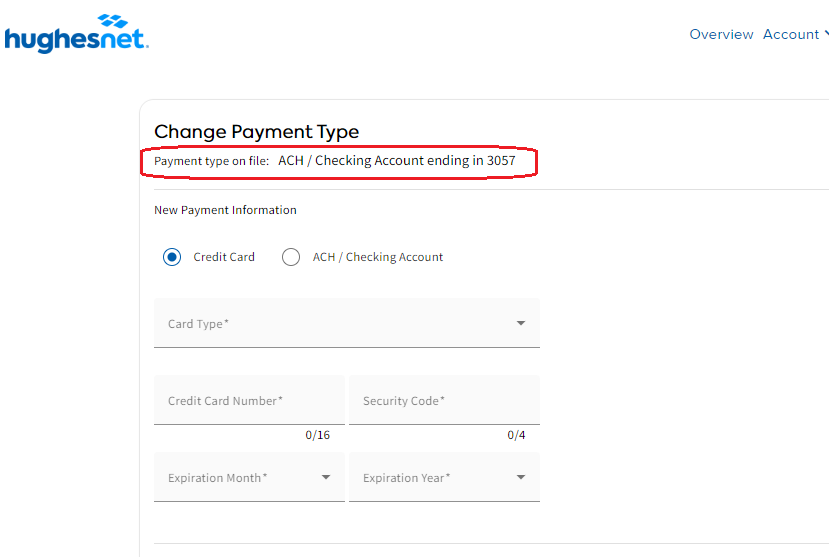
Step 1: Click on ‘Billing’ at the top of the page then ‘Change Payment’.
Step 2: The “Payment type on file” tells you if AutoPay is setup on your account, and the payment option that is setup for AutoPay.
Step 3: Select the new payment option you want to setup and provide the required information before clicking ‘Save Payment’ button. You will see a confirmation that the update is successful.
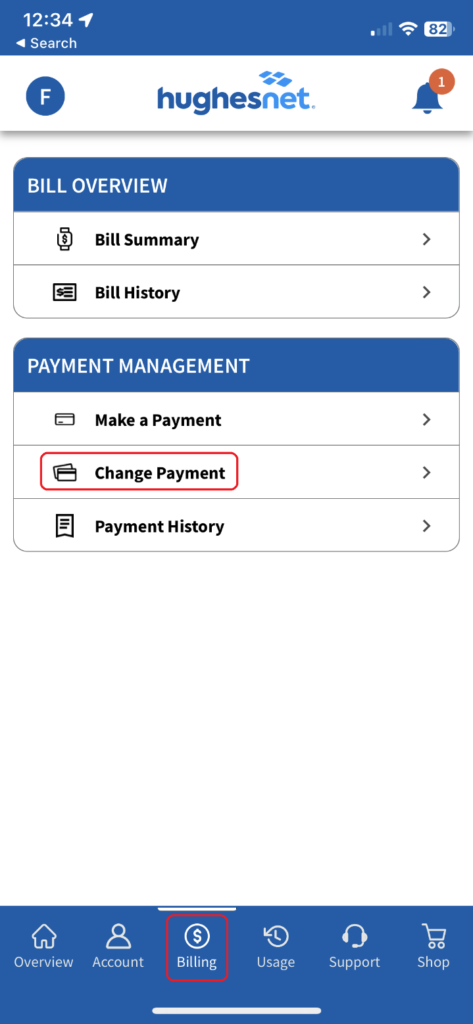
Method 2: Through the myHughesnet (Mobile) App
If you haven’t already, download the myHughesnet (Mobile) App (click here for instructions).
Step 1: Login to the myHughesnet (Mobile) App using your myhughesnet.com username and password.
Step 2: Click on ‘Billing’ from the bottom menu, and then ‘Change Payment’.
Method 3: Calling Hughesnet customer service
Note: By setting up recurring payments via ACH/Checking Account, Credit card, or Debit Card, you are enrolling in AutoPay.
An ACH payment is a type of electronic bank-to-bank payment. The ACH system is a way to transfer money between bank accounts, rather than going through card networks or using wire transfers, paper checks, or cash. Enroll in ACH/Checking Account payments for additional savings on your bill.
Check our other related FAQs below:
For information on understanding your Hughesnet bill, click here.
For information on how to get the most out of your Hughesnet service, click here.
To access our exclusive FAQ video library, login to your myhughesnet.com account and click here.
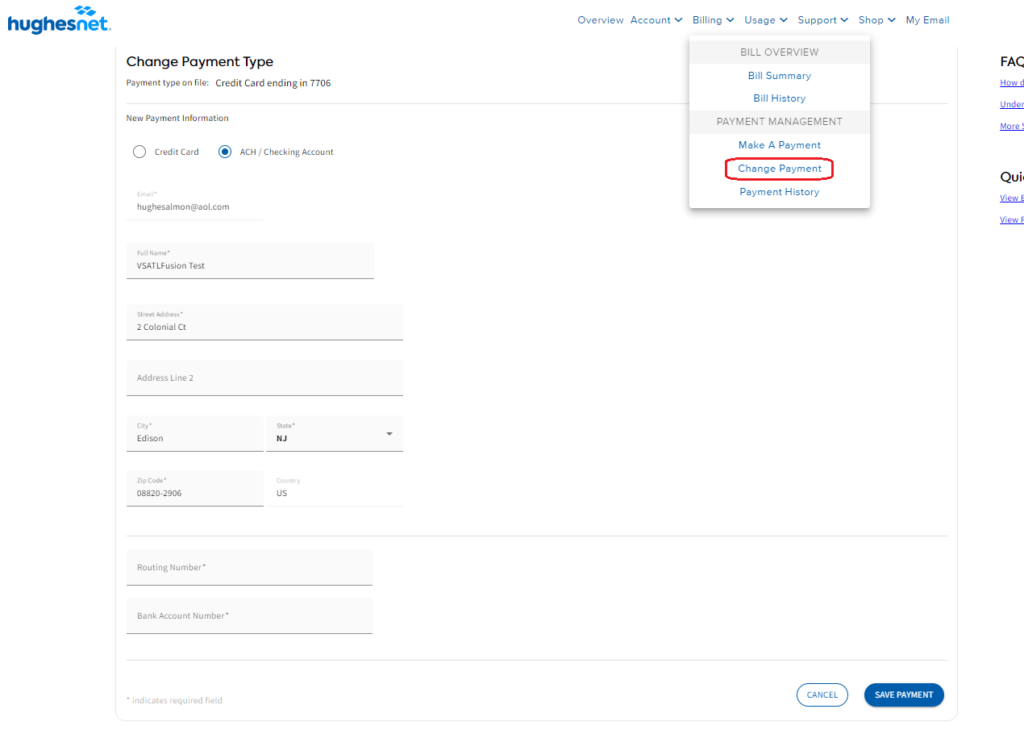
Step 2: Click on ‘Billing’ at the top of the page then ‘Change Payment’.
Step 3: The ‘Payment type on file’ tells you if AutoPay is setup on your account, and the payment option that is setup for recurring payment.
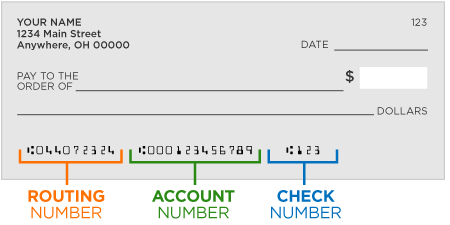
Step 4: Select the ‘Checking Account’ option on the page and enter all the required information including your Routing and Account numbers before clicking ‘Save Payment’ button.
Note: You can locate your Routing and Account numbers by logging into your bank account online or by checking the bottom of your check, as shown below:
Your ‘ACH/Checking Account’ will be setup as your default recurring payment option. By setting recurring payments, you are enrolling in AutoPay.
For more information on how to check if you are enrolled in recurring payments, click here.
For information on where to view the bill, and make payment, click here.
Say hello to new Hughesnet® Fusion® plans, the latest innovation in satellite internet.
Now available in select areas*
Hughesnet Fusion plans use innovative multipath technology, that automatically selects the best path for your internet activities — satellite or wireless — in real time, to reduce delays and deliver a faster, more reliable experience. You can stream video and enjoy smooth video-conferencing, with less buffering. And you can enjoy online gaming with a low-latency connection that won’t spoil the fun.
Responsive
Videos load faster with less buffering.
Reliable
Multipath technology uses the best connection available for your current activity.
Easy
It’s easy to upgrade to a Hughesnet Fusion plan. Login to your myhughesnet.com account or check the myHughesnet (Mobile) app to see if the Hughesnet Fusion plans are available in your area. Alternatively, you can also call Customer Care today at 866-347-3292
What customers are saying:
“Happy Happy Happy Happy Happy 🥰.”
-D.W., Florida
”Basically I can say it’s a great move.”
-P.N., Alabama
Visit legal.hughesnet.com for information on commitment changes when switching to a Hughesnet Fusion plan.
Unpack the box Your shipment includes a Multipath Device, Wireless Antenna, and the necessary cables to connect to your existing Hughesnet® equipment.
Complete the connections Follow the detailed instructionsto connect the new Multipath Device and wireless antenna to your existing Hughesnet Wi-Fi Modem.
There are two options when migrating email content to Gmail. This article specifically discusses migrating content from an existing Hughes.net mailbox to Gmail, but you can also use similar instructions to migrate content to and from another email provider.
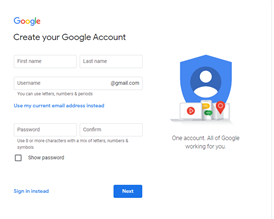
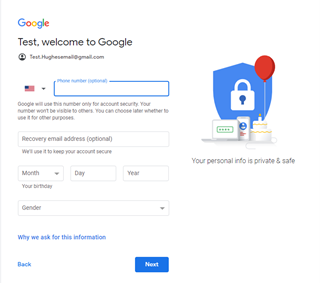
Second Option: Migrate content to your existing Gmail account:
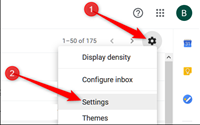
Sign in to your Gmail account, click the settings icon and select “Settings” in the dropdown.
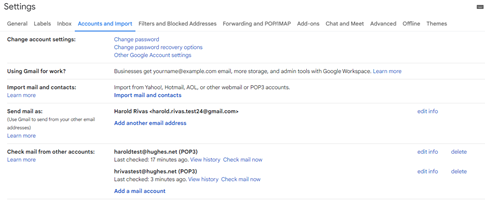
Select “Accounts and Import” on the top menu bar.
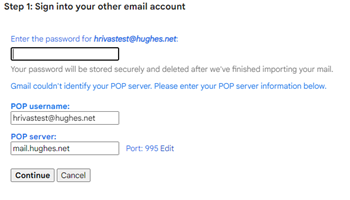
On the prompt, type in your full Hughes.net email account.
Next, enter the password to your hughes.net email account. Then click “Continue.”
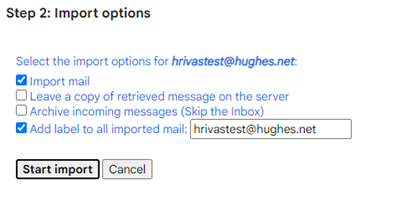
On the following prompt, check the “Import Mail” and “Add Label to all imported mail:” options. Leave the rest unchecked. Then click “Start Import.”
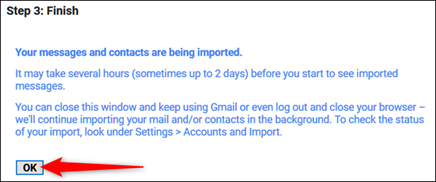
Confirm the final page. The process could take up to several hours, depending on the mailbox size.
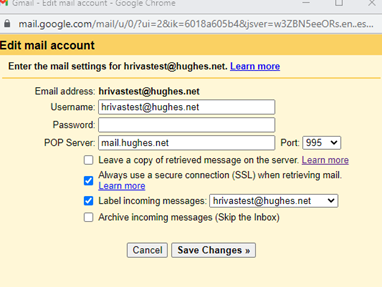
To verify your status, go back to “Settings” and select the “Account and Import” tab on the top menu bar. Under the section “Check Mail from Other Accounts,” you will see the status of the imported emails. Next, click “edit info” next to your Hughes.net email address.
Make sure “Label incoming Messages” is checked. Type in the password to your Hughes.net email account and click“Save Changes.”
Emails will now show up in Inbox and in the Hughes.net label that was just created. Any future Hughes.net emails will be forwarded to this account and will also appear in these folders.
Please note that the “Drafts” and “Deleted” folders from Hughes.net will not migrate via this process. To migrate that data, these will need to be manually forwarded to your Gmail account.